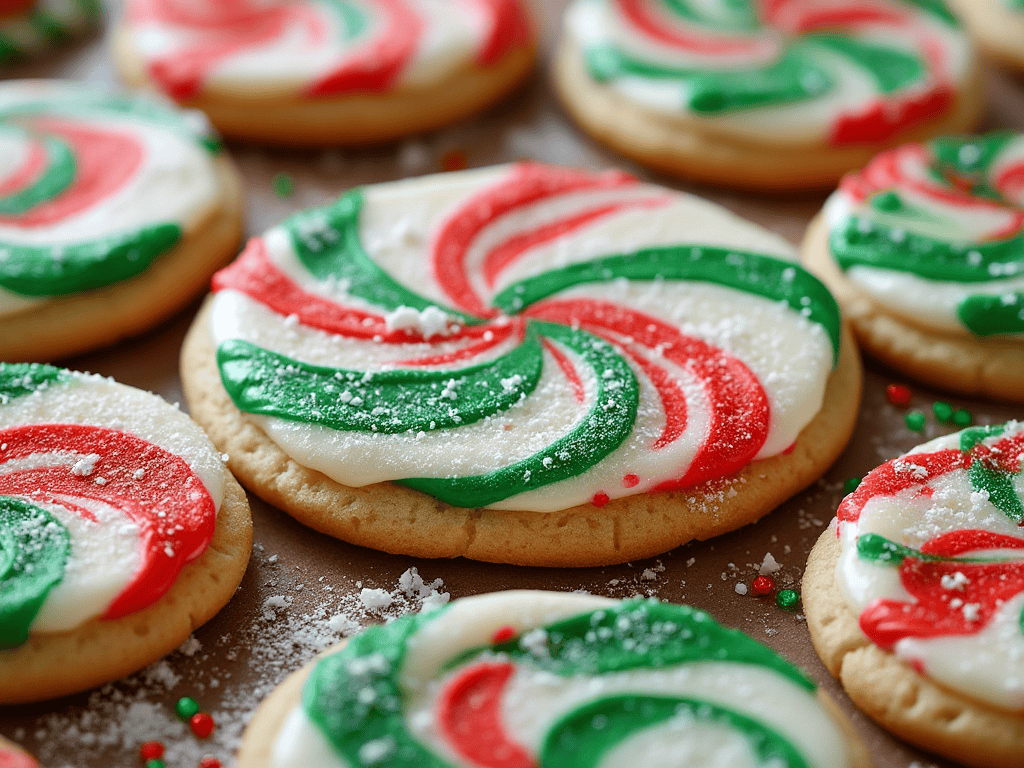
Christmas sugar cookies are a classic holiday tradition that brings joy to people of all ages. There’s something so satisfying about baking a batch of perfectly soft and pillowy cookies, then unleashing your creativity as you decorate them with vibrant icing and fun holiday-themed sprinkles. In this blog post, I’ll walk you through the entire process, from making the dough to crafting Instagram-worthy cookie designs.
Ingredients and Supplies Needed:
Sugar cookie dough (store-bought or homemade, recipe below)
Royal icing (recipe included below)
Food coloring (red, green, white)
Piping bags and tips
Sprinkles, sanding sugar, and other decorations
Rolling pin and cookie cutters (holiday shapes like trees, stockings, snowflakes)
Baking sheets and parchment paper
Making the Sugar Cookie Dough
Ingredients:
2 3/4 cups (345g) all-purpose flour
1 teaspoon baking powder
1/2 teaspoon salt
1 cup (230g) unsalted butter, softened to room temperature
1 1/2 cups (300g) granulated sugar
1 large egg, at room temperature
2 teaspoons vanilla extract
Instructions:
In a medium bowl, whisk together the flour, baking powder, and salt. Set aside.
In a large bowl, beat the butter and sugar together until light and fluffy, about 2-3 minutes. Beat in the egg and vanilla extract until combined.
Gradually mix the dry ingredients into the wet ingredients until a dough forms. The dough will be thick and slightly crumbly.
Divide the dough in half, shape each half into a disk, and wrap in plastic wrap. Refrigerate for at least 1 hour and up to 3 days.
Preheat oven to 350°F (177°C). Line baking sheets with parchment paper.
Remove one disc of dough from the refrigerator. On a lightly floured surface, roll the dough out to 1/4-inch thickness. Use cookie cutters to cut out shapes.
Carefully transfer the shaped cookies to the prepared baking sheets, spacing them about 1 inch apart.
Bake for 8-10 minutes, until the edges just begin to lightly brown.
Allow cookies to cool on the baking sheet for 5 minutes before transferring to a wire rack to cool completely before decorating.
Royal Icing for Decorating Your Christmas Cookies
Ingredients:
4 cups (500g) confectioners’ sugar, sifted
3 tablespoons meringue powder
5-6 tablespoons water
Instructions:
In a large bowl, combine the sifted confectioners’ sugar and meringue powder.
Add 5 tablespoons of water and beat on high speed for 5-7 minutes, until the icing is thick, glossy, and forms stiff peaks.
The consistency of the royal icing is crucial for achieving beautiful cookie decorations. You want it to be the right thickness for both piping outlines and flooding the cookie centers.
For piping details and outlines:
The icing should be thick enough to hold its shape when piped. It should form soft, flexible peaks when the beater is lifted. This thicker icing is perfect for creating crisp lines and designs.
For flooding the cookie centers:
The icing needs to be a bit thinner and more fluid for evenly covering the cookie surfaces. To achieve the right flooding consistency, add an additional 1-2 tablespoons of water and beat until the icing becomes smoother and more spreadable, but still maintains some structure.
Test the consistency by lifting the beater – the icing should slowly drip back into the bowl, forming ribbons that briefly hold their shape before melting back in.
If the icing is too thick, add more water 1 teaspoon at a time until you reach the desired consistency. If it becomes too thin, simply add a bit more sifted confectioners’ sugar.
The key is to find the sweet spot – an icing that is fluid enough to spread easily, but not so runny that it loses its ability to hold defined lines and shapes.
Decorating Christmas Sugar Cookies
Once you have your freshly baked sugar cookies cooled completely, it’s time to get decorating! Here’s the process:
Outline the Cookies
Fit a piping bag with a small round piping tip (such as Wilton #2 or #3) and fill it with your thicker royal icing. Pipe outlines around the edges of the cookies, tracing the shapes. This will create a defined border.
Flood the Centers
Switch to a wider piping tip (Wilton #4 or #5) or snip the end of the piping bag to create a larger opening. Thin out the royal icing with a bit more water until it has a smooth, fluid consistency, perfect for “flooding” the centers of the cookies. Slowly pour or pipe the thinned icing into the outlined areas, gently spreading it to the edges with a toothpick or small offset spatula.
Add Sprinkles & Decorations
While the flooded icing is still wet, sprinkle on your desired toppings – nonpareils, sanding sugar, sprinkles, dragées, etc. Get creative with different shapes, colors, and patterns.
Let Dry Completely
Allow the decorated cookies to dry for several hours, or even overnight, so the icing can fully set. The cookies should feel dry and the icing should have a smooth, shiny finish.
Get Creative with Design Ideas
Here are some festive cookie decorating ideas to try:
Classic Red & Green Swirls: Pipe red and green icing in a swirling pattern across the cookie surface.

Sparkling Snowflakes: Outline the cookies with white icing, then flood the centers. Top with white nonpareils or sanding sugar for a shimmery snowflake effect.

Santa Hat Cookies: Outline the cookies in red icing, then flood with white icing. Use a small round tip to pipe a red “hat” on top.

Christmas Tree Designs: Outline the cookies in green icing, then flood with a contrasting color like red or white. Pipe on “ornaments” using different colored icing and sprinkle with sanding sugar.

Storing Decorated Christmas Cookies
Once you’ve put all your hard work into baking and decorating these beautiful Christmas cookies, you’ll want to make sure they stay fresh and the icing remains intact. Here are the best practices for storing them:
Room Temperature Storage
Allow the freshly decorated cookies to dry completely, at least 2-3 hours or overnight.
Once fully set, stack the cookies between layers of parchment or wax paper in an airtight container.
Store the container at room temperature, out of direct sunlight, for up to 1 week.
Refrigerator Storage
If you need to store the cookies for longer than 1 week, you can keep them in the refrigerator.
Place the cookies in a single layer in an airtight container. Separate the layers with parchment paper.
Refrigerate for up to 2 weeks. Let the cookies come to room temperature before serving for best texture.
Freezer Storage
For maximum longevity, you can freeze the decorated cookies for up to 3 months.
Arrange the cookies in a single layer on a baking sheet and freeze until solid, about 2-3 hours.
Once frozen, transfer the cookies to an airtight container or freezer-safe bag, sealing out as much air as possible.
Thaw overnight in the refrigerator before serving.
Tips to Prevent Smearing:
Make sure the royal icing is fully set and dry before stacking or storing the cookies.
Use parchment or wax paper between layers to prevent the iced surfaces from sticking together.
Handle the cookies carefully, avoiding pressing on the decorated areas.
If stacking, place a clean paper towel between each layer to absorb any excess moisture.
With these storage techniques, your beautifully decorated Christmas sugar cookies will stay fresh and vibrant for up to 2 weeks. If you don’t eat them all before then!
ENJOY!
Christmas sugar cookies are a wonderful way to get into the holiday spirit and create edible works of art. With the right recipe, tools, and decorating techniques, you can make cookies that are both delicious and visually stunning. Gather the family for a festive cookie baking session, or package up a batch to share with neighbors, teachers, and loved ones. Enjoy, and Merry Christmas!


